Amazon Storefront 101
One of the most asked questions I get is, “Can you help me set up an Amazon storefront?” I started my Amazon Storefront in the summer of 2019 when I realized I could easily monetize my online shopping habit. Since that time, social media apps like TikTok and Instagram have grown exponentially and most creators - big or small - have Amazon Storefronts. I highly encourage everyone who enjoys sharing Amazon finds to create a storefront! The commission on each Amazon item varies, but it can really add up if you post and share diligently :) I’ll outline the steps to creating your own storefront below!
Step One: Sign Up for the Amazon Influencer Program
There are 2 separate Amazon programs that allow you to post commissionable links: Amazon Associates and Amazon Influencers. The primary difference is that the Associate program only provides you access to links from each product page, while the Influencer program allows you to make an entire storefront for people to shop the products you recommend and share your page URL more easily.
You can sign up using your existing Amazon account. However, keep in mind that you can also make a new Amazon account specifically to host your Amazon storefront. This will allow you to use your existing Amazon account to shop your own storefront and earn commission from your personal purchases ;)
Once you determine which Amazon account you’ll be signing up with, you will be asked questions such as your social media handles, follower count, age, etc. It can take anywhere from 2 days to 2 weeks to get approved!
Step 2: Build Your Storefront
Once you’re approved, the fun begins! I recommend building and customizing your Amazon Storefront on a desktop laptop or computer rather than your cell phone. It’s much easier to navigate, create idea lists, and upload photos in the correct formatting from a desktop.
You’ll first want to customize with a Display Name, such as “Greyson’s Amazon Addiction” or “Grey’s Amazon Storefront” - this can be as regular or random as you want. I also recommend adding a Bio and your other Social Media handles, so followers of your Storefront can find you on other platforms, too! A profile photo and cover photo will also help complete your Storefront’s overall aesthetic.
Next, you’ll want to make sure your Payment Method is set up appropriately. This is different than the payment you use to make personal Amazon purchases. You can have your commission directly deposited into your bank account, and this will be set up under your Associate Account > Payment and Tax Information. This is VERY IMPORTANT if you want to actually receive the money you’ll be making from posting your storefront.
Once your customization and payment method is complete, you can start creating “Idea Lists!” These are individual folders that help you organize different types of products you’ll be saving to your Storefront. For example, I have an Idea List called “Beauty” where I add all hair, makeup, and self-care products. These Idea Lists make Storefront navigation extremely easy, especially if you’ll have a LOT of products on your Storefront like me :)
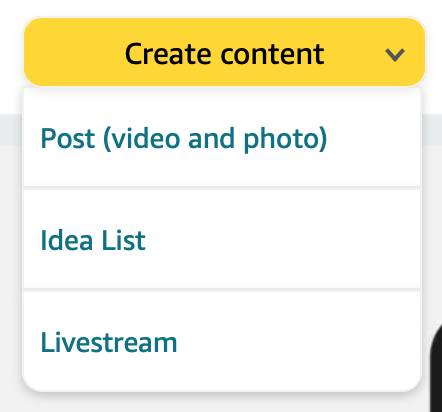
You’ll create new Idea Lists by clicking on “Create Content” in the top left corner of your Storefront’s home page, and selecting “Idea List.” From there, you’ll name and describe your Idea List before adding products to it.
Once your Idea List has been created, you can start adding products to it! You can either search and add products directly from the Idea List (I personally think this is the more complicated option), or you can search for products if you were shopping on Amazon yourself and then click “Add to List” on the specific product page. The “Add to List” button is underneath the “Add to Cart” button and you can select from all your Idea Lists there.
Step 3: Share Your Storefront!
Once you have content on your Storefront, share it on Social Media and with friends! I personally link my Storefront in my Instagram bio, on my Instagram Stories, on this website, and in a private Facebook group dedicated to sharing my Amazon finds. You can share commissionable product links directly by clicking on the “Share” button on the product page, individual Idea Lists by clicking on “Share” in each individual list, or your entire Storefront by clicking the “Share” button on your Storefront’s home page. The sharing options are endless!
Step 4: Track Your Earnings
Commission varies on Amazon. Products can produce commission anywhere from 1%-20% of the listed price. You can view your earnings by logging into your account at Amazon Associates Central. On the Reports tab, you can filter to different date ranges to track the money you’ve earned. Payments are posted approximately 2 months after the purchase month, so January commission would be deposited into your account in late March. If a deposit ever fails, you’ll be notified via email! This program is really great about making sure you get the money you’ve earned :)
Just have fun with it! I began building my social media into what it is today through the Amazon Influencer Program and I’m so happy I did. If you have any questions about this, please don’t hesitate to reach out!


